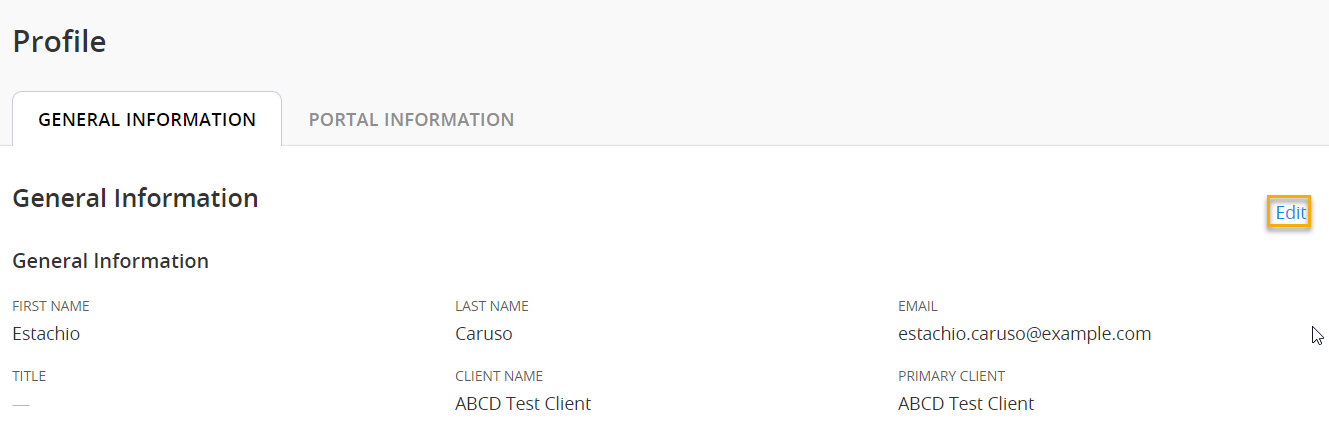
Update your profile
-
In the upper-right corner of the page, select your name.
-
Select Profile.
-
Use the tabs to switch between General Information, Portal Information, and Notification Settings.
-
Select Edit.
-
Make the necessary changes.
 General Information
- First Name
- Enter the contact's first name.
- Last Name
- Enter the contact's last name.
- Enter the contact's email address. Use an address associated with your institution.
- Title
- Enter the contact's job title.
- Client Name
- Select the client or clients associated with the contact.
- Primary Client
- Select the client that appears by default when the contact logs in to Client360. If the contact has only one client, that client is the Primary Client.
- Business Phone
- Enter the contact's business phone number. If it is a cell number, the contact can use it for Client360 multifactor authentication.
- Mobile Phone
- Enter the contact's mobile phone number. If it is a cell number, the contact can use it for Client360 multifactor authentication.
- After Hours Phone
- Use the primary contact number when you need to reach the contact outside of normal business hours.
- Language
- Select the contact's preferred language.
- After Hours Contact
- Select to allow us to call this contact at their After Hours Phone number.
- Time Zone Setting
- Select the contact's time zone.
Fiserv associates use this data to manage inquiry communications. Keep this information current.
Use your mobile phone for Multifactor Authentication (MFA). Provide a cellular (mobile) phone number to receive MFA codes.
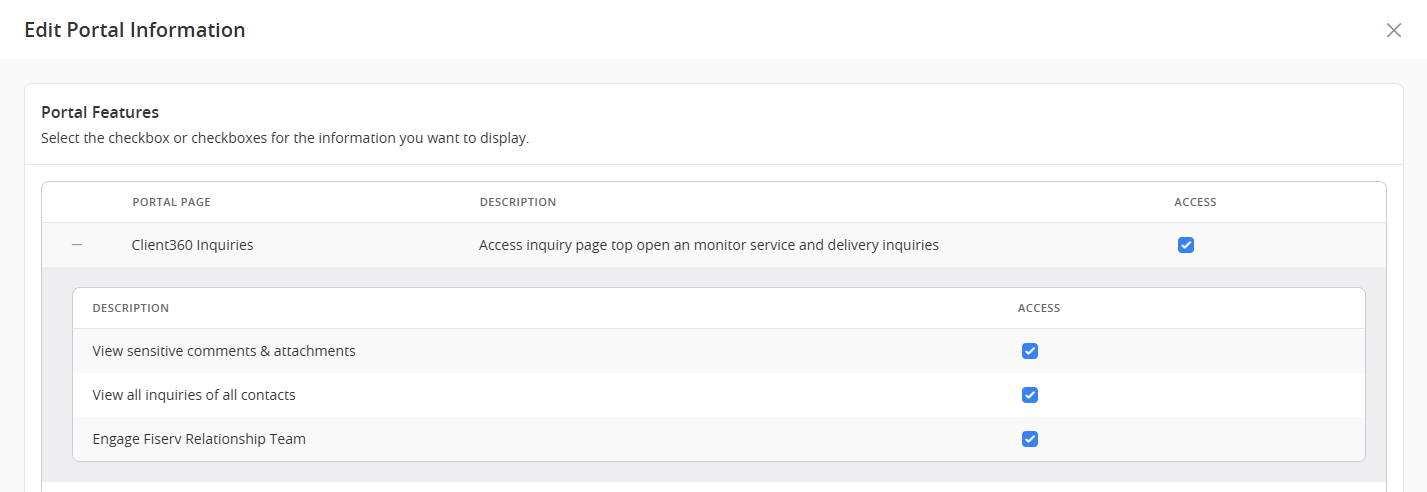
Portal Information
Portal Features
- View sensitive comments & attachments
- Select to allow contacts to see all sensitive comments and attachments in inquiries. Sensitive comments are those containing PII or PCI information. Client360 treats all attachments in an inquiry as sensitive.
- View all inquiries of all contacts
- Select to display the All Inquiries tab in the contact's inquiry dashboard. This tab allows contacts to see all inquiries for your institution.
By default, contacts only see the My Inquiries tab, which only displays inquiries linked to their own profile.
- Engage Fiserv Relationship Team
- Select to allow contacts to add their Fiserv Relationship Team members as watchers on an inquiry.
- Admin report and Inquiry Report
- Select to allow contacts to access those report types.
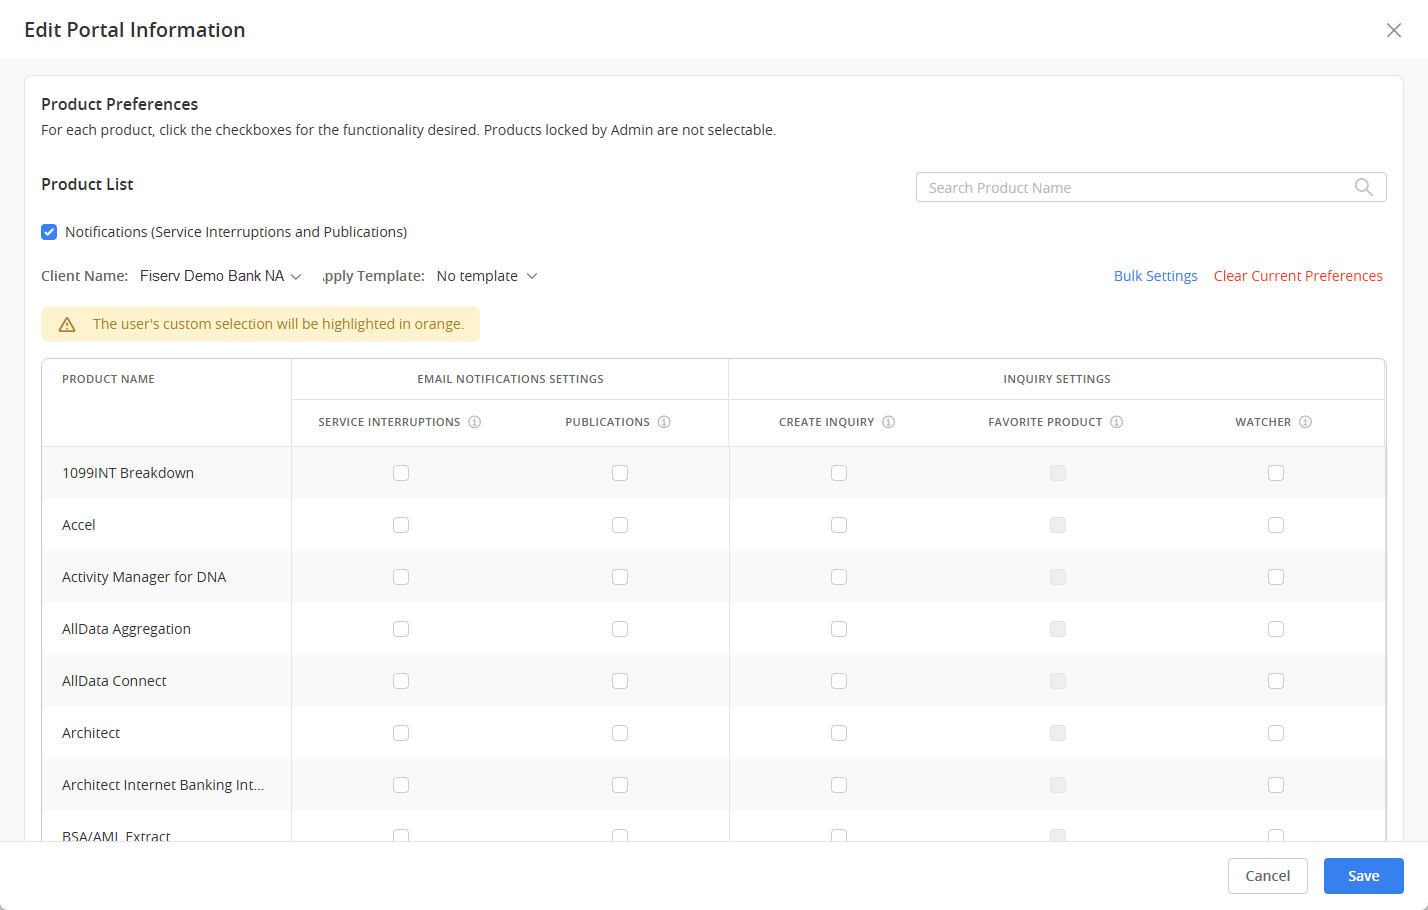
Product Preferences
The Client Name dropdown menu displays only if you select multiple Client Names for the contact in the General Information tab.
- Notification (Service Interruptions and Publications)
- Select to allow the contact to receive notifications related to their product preferences. When unchecked, the contact does not receive any email notifications, regardless of the contact's product preferences.
This does not refer to password change or inquiry notification email notifications from Client360.
- Email Notification Settings
- Select to allow contacts to select the notifications they want to receive for each product.
This setting works with Notification (Service Interruptions and Publications). Enable this setting to allow contacts to receive the notifications they subscribe to.
- Inquiry Settings
- Select to allow contacts to perform various activities within inquiries by product.
- Create Inquiry
- Select to allow contacts to create inquiries for the product.
- Favorite Product
- Select to set the product as a favorite for the contact when creating an inquiry.
- Watcher
- Select to automatically add contacts to the watchlist for any inquiry opened for that product.
- Admin Lock
- Select to lock product settings. This prevents contacts from changing their Email Notification Settings and Inquiry Settings for the product.
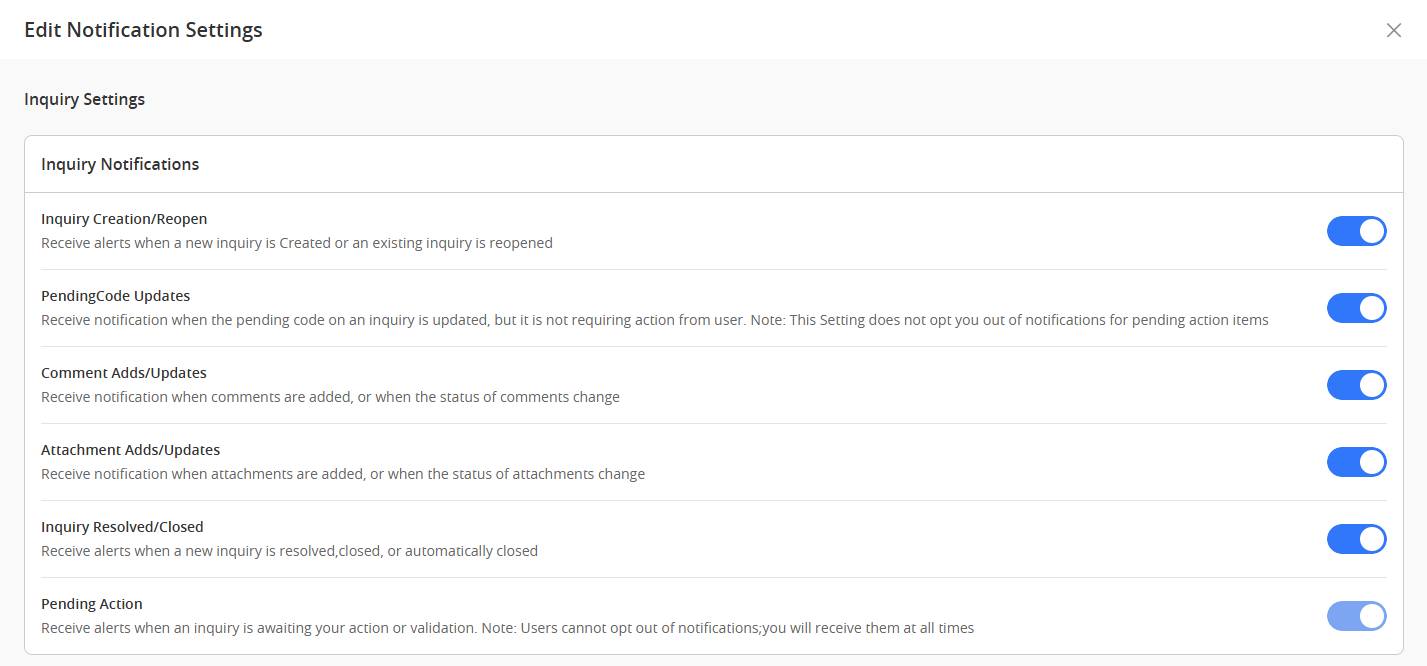
Notification Settings
Select the inquiry activity for which you would like to receive notifications.
-
Select Save.